We are going to build an app that can help you sell your tickets, welcome new subscribers, or send a greeting card in response to a contact form. We are going to use NoCodeAPI, Google Sheets and Zapier integrations.
Let’s start.
Step 1 : Create a Google Sheet with Proper headers
- Click here to go to Google Sheets website
- Create a new sheet and give it a name of your choice e.g Feedback Form
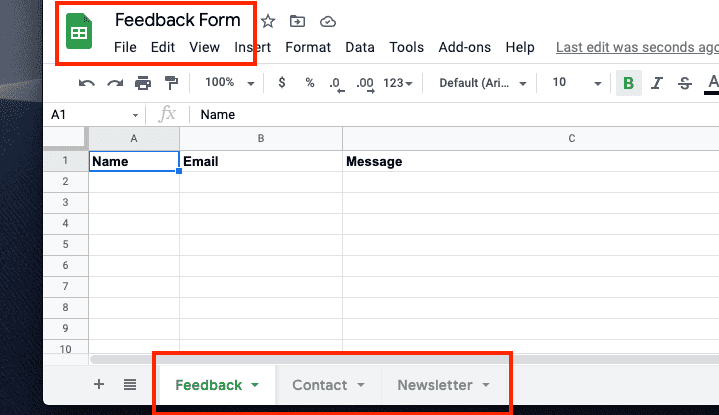
- Create 3 x tabs of this sheet :- Feedback, Contact & a Newsletter
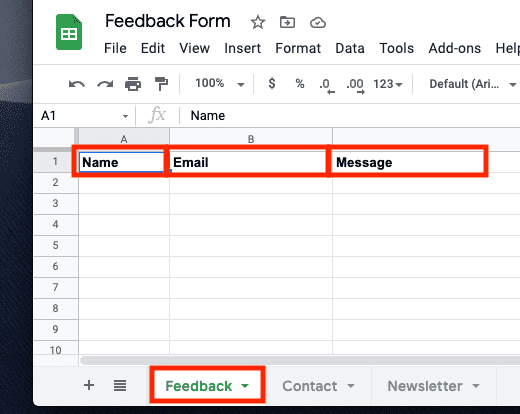
- Create Column Headers in each tab.
Feedback Tab
- Headers = Name, Email, Message
Contact Tab
- Headers = Email, Message

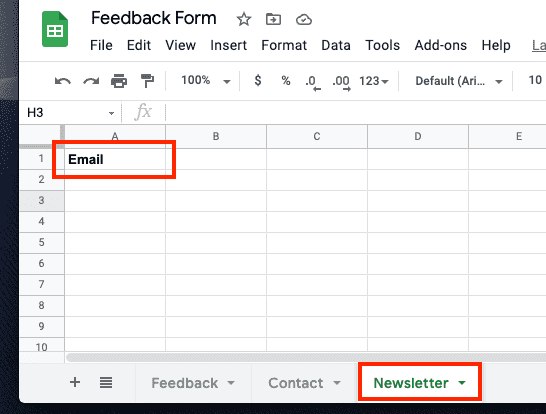
Newsletter Tab
- Headers = Email
Step 2 : Create NoCodeAPI endpoint to manage your google sheet
- Click here to Sign in to NoCodeAPI dashboard
- Find Google Sheet in the marketplace and click “Activate”
- Click on “Make Google Sheets API”
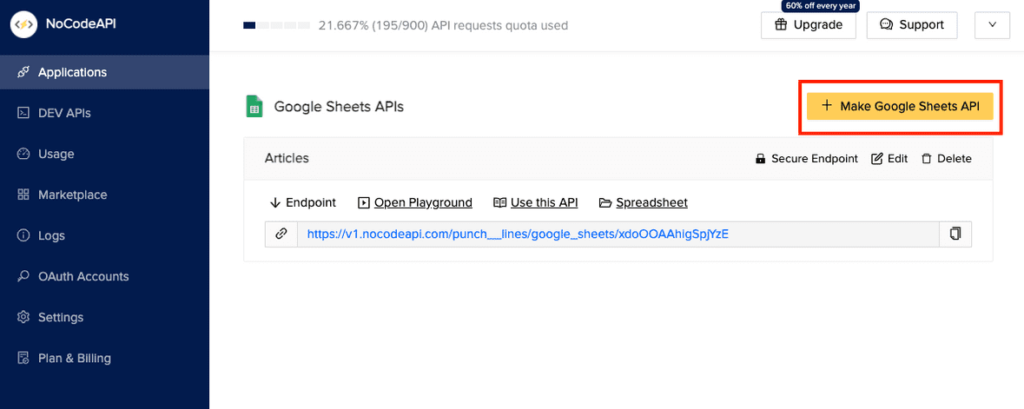
- A side bar appears asking you to “Choose an account”, a “name” and your “sheet Id”.
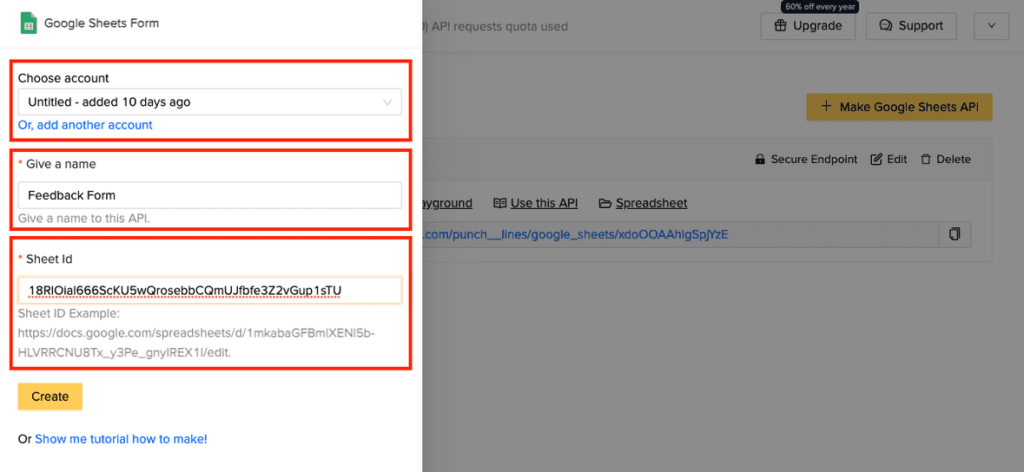
- As you press “Choose an account”, NoCodeAPI will ask you for permissions to manage your Google Sheets. Select “Allow”.
- Write a custom name of the endpoint, e.g – feedback form
- Enter the “sheet Id”. The sheet Id is present in the URL of your google sheets. If your URL is
https://docs.google.com/spreadsheets/d/18RlOial666ScKU5wQrosebbCQmUJfbfe3Z2vGup1sTU/edit#gid=0; then your sheet Id is the part betweend/and/edit. In this case it is18RlOial666ScKU5wQrosebbCQmUJfbfe3Z2vGup1sTU. Enter this sheet Id in the NoCodeAPI Form. - Click “Create”.
Step 3 : Update React Form in CodeSandbox
We have prepared a sample React app to demonstrate NoCodeAPI in action.
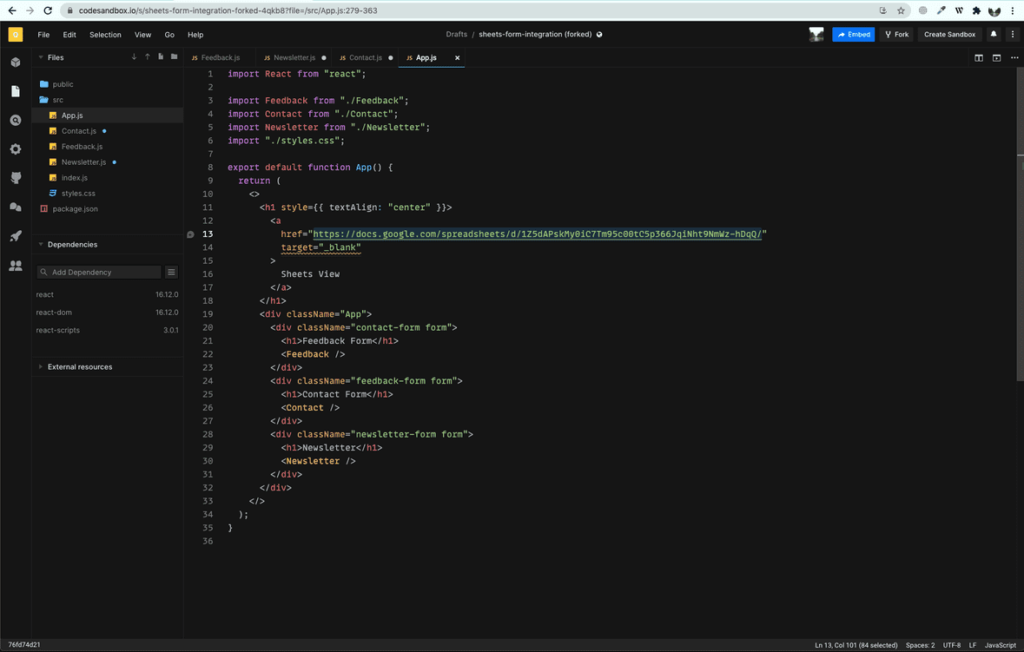
- Click here to open the React App in CodeSandbox.
- We are going to edit 4 x URLs in following 4 x files.
App.js
- Update the
atag’s href attribute with your ownGoogle Sheet URL.
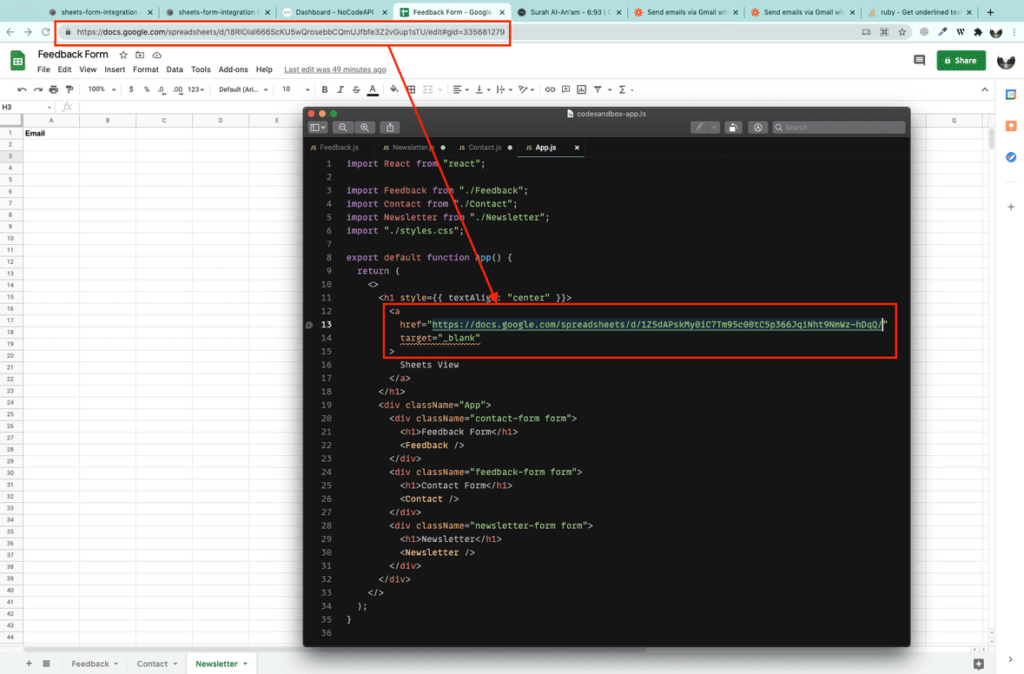
Contact.js
- Update the
POSTrequest URL with your NoCodeAPI endpoint. Make sure, you alter the part before the?mark. Do not altertabId, as it is the Sheet Name where we are going to place the data.

Feedback.js
- Update the
POSTrequest URL just like you did for Contact.js file.

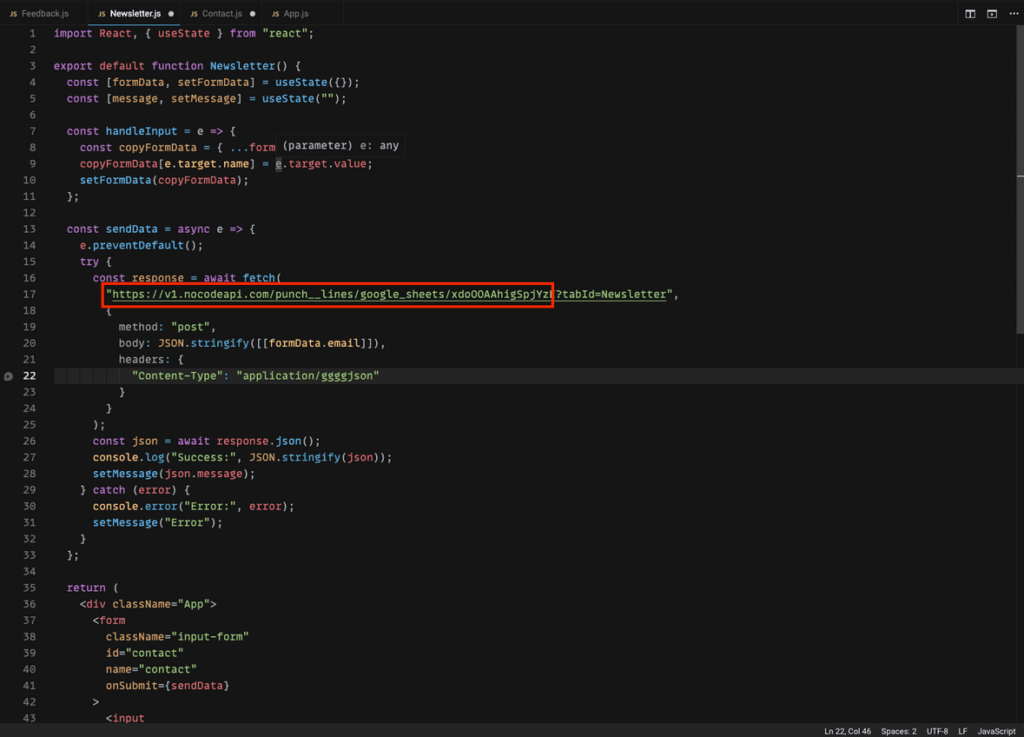
Newsletter.js
- Update the
POSTrequest URL like you did for Contact.js and Feedback.js files.
Step 4: Test if these forms are working
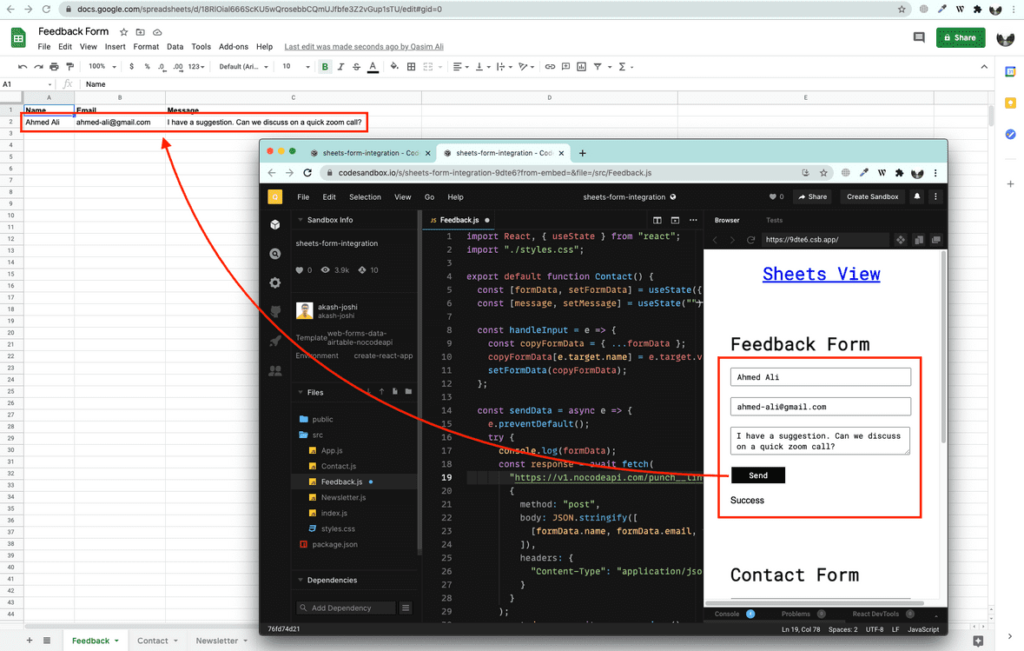
- On the “Preview window” of CodeSandbox, fill all three forms and submit.
- You should see a success message showing up under the buttons.
- Go to your “Google Sheets” to make sure these values are updated in all three tabs i.e Feedback, Contact and Newsletter.
Step 5: Connect Zapier to welcome new users
- Click here to Sign Up to Zapier.
- As you reach zapier home, you can see the existing zaps listed on the dashboard.
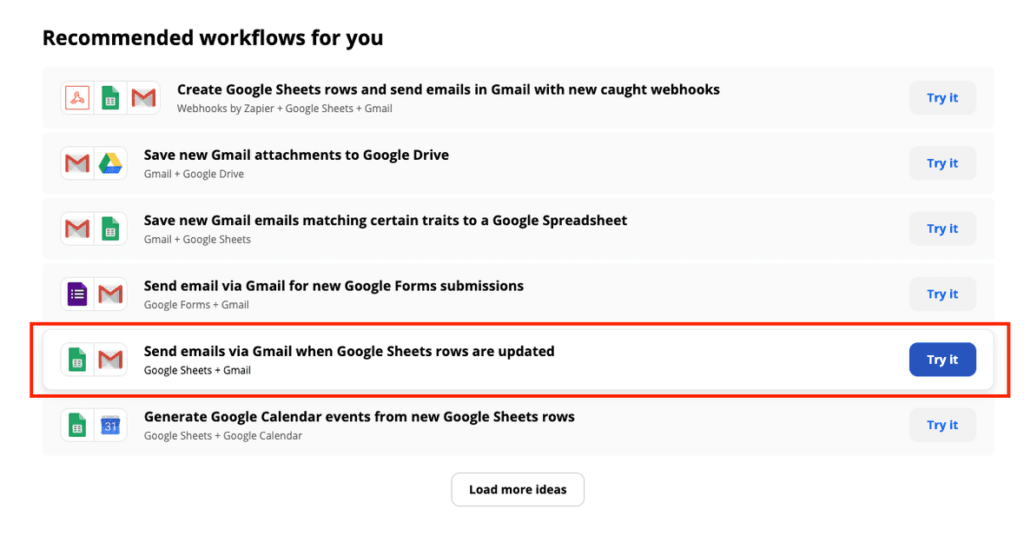
- Click here to find above sample
- Connect your Google Account in the zap’s first step.

- Select the Google Sheet “Feedback Form”
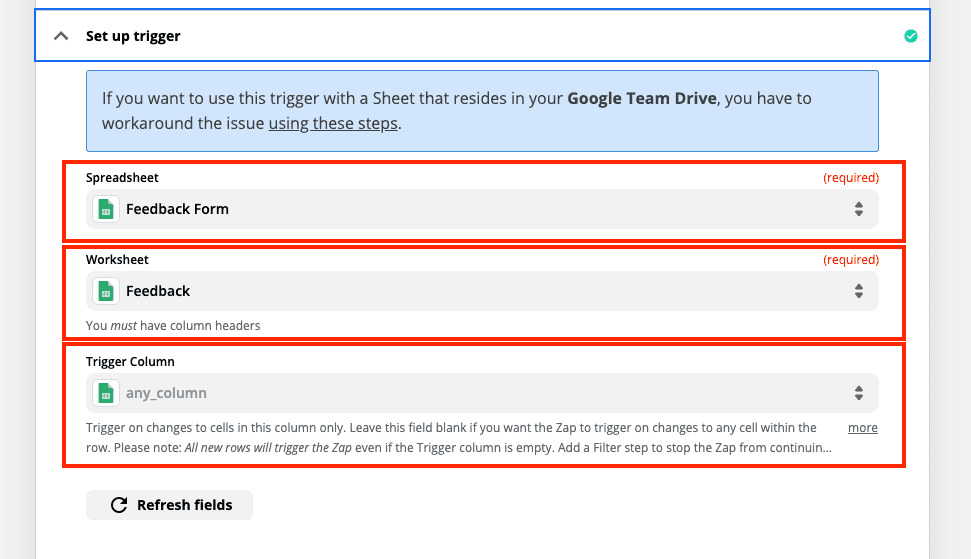
- Select Worksheet tab in the next step. Note that we need 3 x zaps to connect all 3 x forms. In this tutorial we are connecting only 1 tab i.e > ‘Feedback’ tab.
- In the “Trigger Column” dropdown, select the “clear” button.
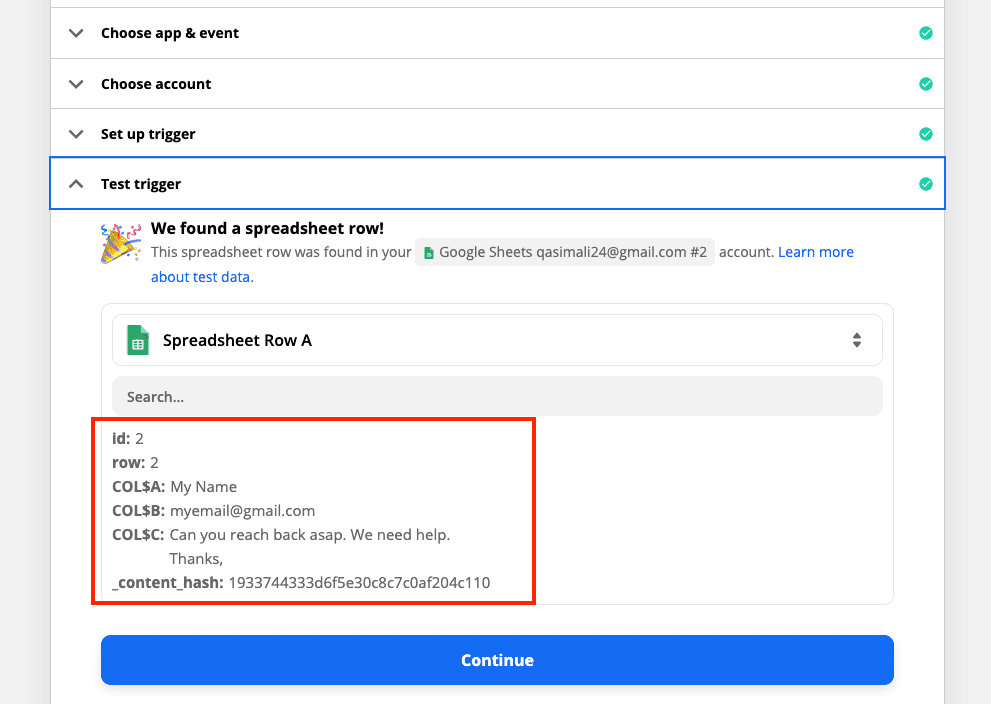
- If all is setup right, you should see the “Test trigger” dropdown like below.

- Press “Continue”
- In the “Action” part of our zap, we are going to send the email to the person who submitted this Feedback.
- In “Choose Account” dropdown, select the email which you want to send email from.

In “Set up action” dropdown, we are going to update following inputs
To= 1.EMAIL (this is the email of our last updated row in google sheet) Description. zapier action portion, connects the sample data of latest google sheet entry to make it easier to understand. Like1.Emailis showing our last google sheet entry.
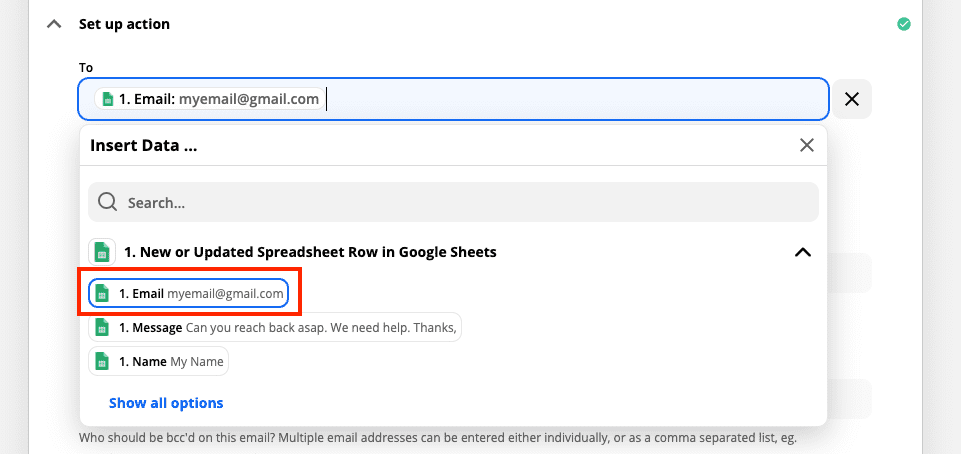
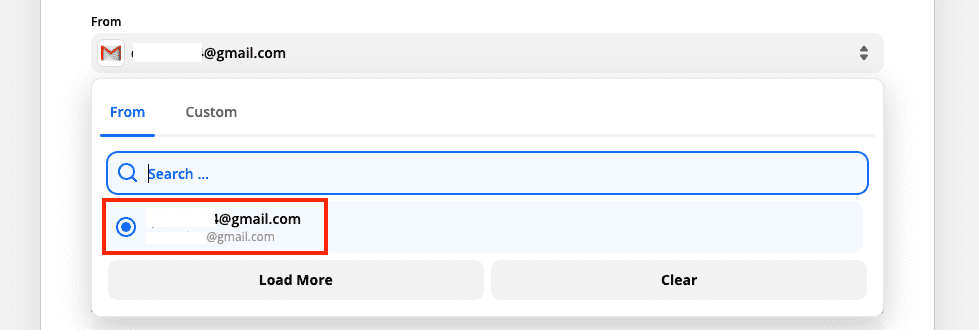
From= Select the only email showing up in the drop down. It is the email which will send an email to your users.
From Name= This is the name that shows up in your user’s inbox.Subject= Give the email a welcoming subject e.g Contacting you soon
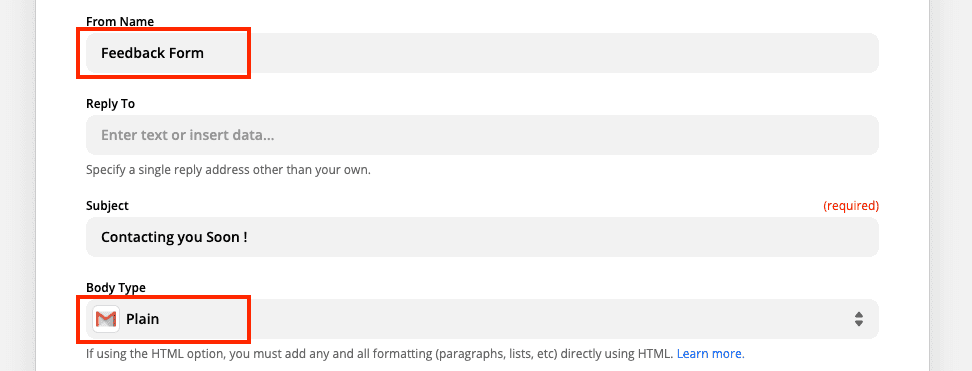
Body Type= Keep it Plain. If you know HTML, you can beautify your email as you wish.Body= Format your email body here. Elaborate your email while keeping it concise.

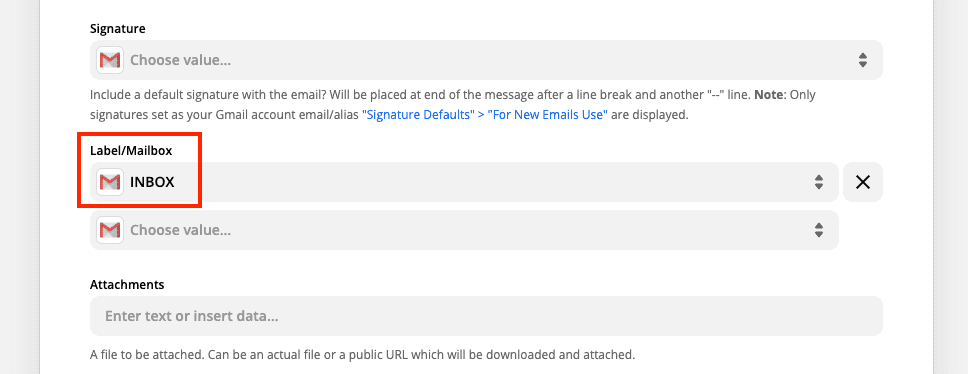
Signature= If you have listed your signature on gmail, you can select it here. You may leave this part.Label / Mailbox= Select the dropdown to “INBOX” to make sure your emails do not land in Junk mail.Attachments= If you want to send an attachment to user e.g presentation, a book or invoice, you can attach it here.
- Select “Continue”

- Select “Test & Continue”
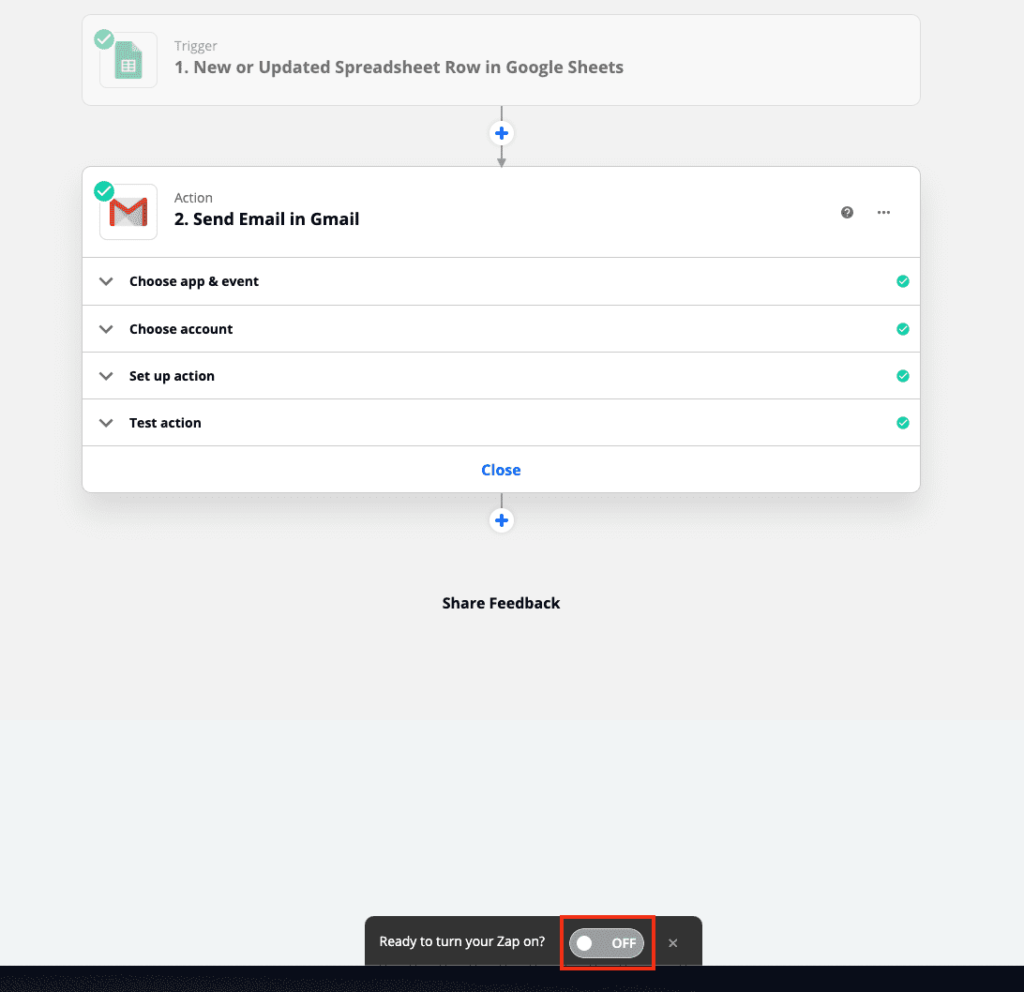
- At the bottom of the page you can find a toggle switch asking you to Turn On the zap. Go ahead and switch it on.
Step 6: Test the complete Integration
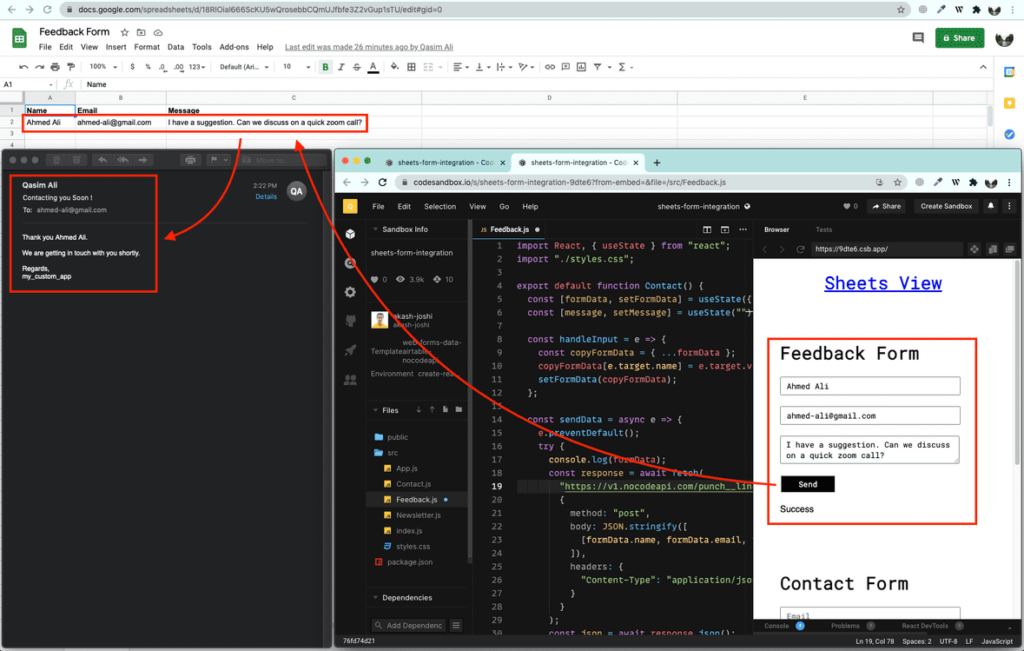
- Go to the CodeSandbox forms and fill in the required information.
- Submit the Feedback form and it should show you a success message below the button.
- After few seconds you will find that a properly formatted email is sent to the users’s email address. You can find it in your “Sent” mailbox folder.
Step 7 : Create the remaining zaps
We built only 1 zap in this tutorial. Currently, only Feedback form submit will send an email. To integrate the remaining forms, we need 2 x additional zaps. You can repeat Step 5 and 6 for the other forms i.e Contact Form and Newsletter Form.
Conclusion
You can use NoCodeAPI – Google Sheet – Zapier integration to build numerous use cases. For example,
- You can send a list of your previous newsletters to a new subscriber.
- You can send a Greeting card when a new user registers for an event.
- You can send log in details to your users where you do not want to build your own Sign Up / Sign In scenario.
- and much more.
This is it...
We hope you enjoyed reading this tutorial.
We are working on some cool new features on NoCodeAPI. You can motivate us at @nocodeapi. Thanks for reading. Happy Coding 🔥.
