Let’s build your status website that keeps you informed about the statuses of your websites. You can use it for
- Tracking your website response time over period
- Monitor health of your server (like if Digital Ocean is better for your specific use case or Netlify ?)
- You can compare two websites on one page
- Or you can use it in your resume
Ok — I think we have enough reasons to build our uptime robot website.
Step 1 : Fork our ready made ‘status’ website on GitHub
We are using it at nocodeapi — https://status.nocodeapi.com. You can use this to show case your statuses.

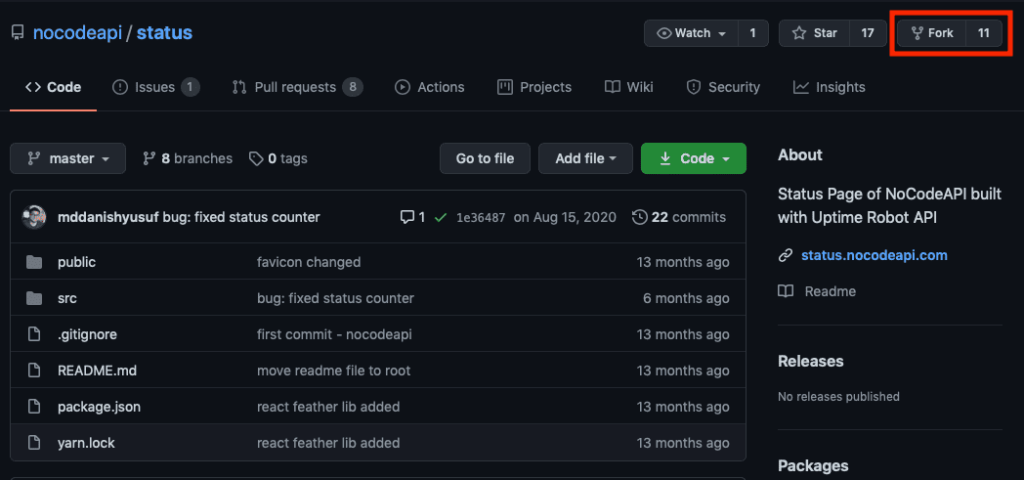
- Go to github. https://github.com/nocodeapi/status
- Click on fork on the top right corner. (Fork means copy paste this repository in to your GitHub account)
- Choose your repository account and click ok. (This option appears if you have more than one account opened in GitHub)
- Go to
/src/env.jsfile in your forked repository. - We are going to update our key | value pairs for
env.jsfile in following steps (Step 2 to Step 5).
Step 2 : Get your uptime robot API Key

- Go to uptime robot website & Sign Up. Click here
- Click on
Add New Monitorand list your website URL. (Uptime simply pings your website to check its status. You do not need any integration on your website side.) - Click on
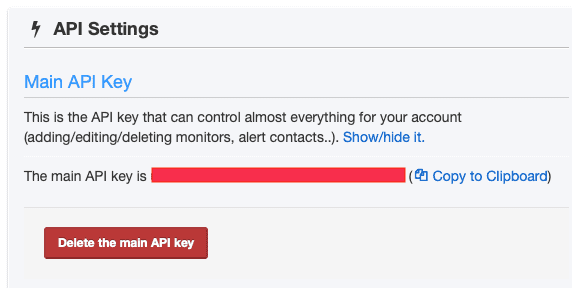
Main API KeyunderAPI SettingsandGenerateyour API Key.
Step 3 : Get your Uptime Robot Monitor(s) IDs
- On uptime robot website, click on your monitor.
- Get your monitor’s ID from the URL. Like this 👉 If you observe the URL, you will find your monitor ID. In
https://uptimerobot.com/dashboard#784130462, after#784130462is your monitor ID. - If you have more than one monitors, then get all their IDs pasted in your notepad.
Step 4: Create your API end point on NoCodeAPI

- Click here to Sign in to your NoCodeAPI account.
- Go to market place and search for
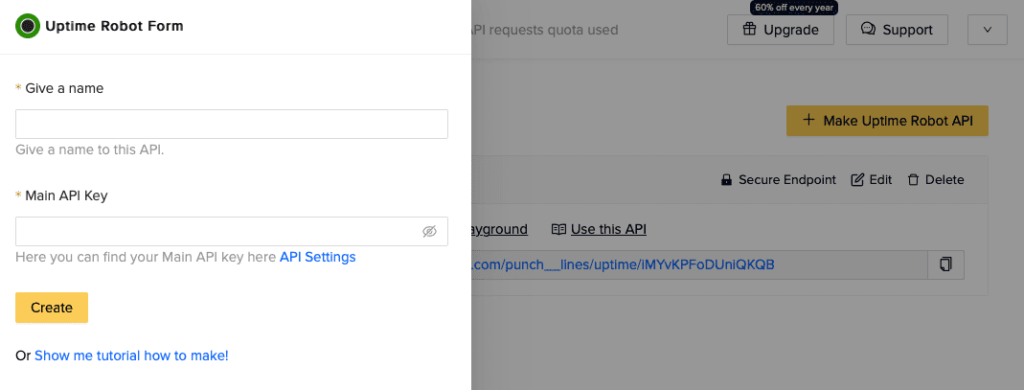
uptime robot. Then clickActivate. - Click on
Make Uptime Robot API - Sidebar appears. Now write your
nameandmain api keyyou found in Step 1.
Step 5: Properly format your NoCodeAPI endpoint

- If you have only one monitor then add
?monitors=784130462with your endpointhttps://v1.nocodeapi.com/betauser/uptime/OVprBNKOwXSfWhjHand it will look like thishttps://v1.nocodeapi.com/betauser/uptime/OVprBNKOwXSfWhjH?monitors=784130462 - But if you have more than 1 monitors on your uptime robot website. You can add them to your endpoint like this
https://v1.nocodeapi.com/betauser/uptime/OVprBNKOwXSfWhjH?monitors=784130462-784130463-784130464
Step 6 : Update env.js file in your GitHub repository

- Update the ENDPOINT variable with the one you formatted in above step (Step 5).
- Give your choice of
title, yourwebsite link, yourtwitter handleand yourtwitter link. - Click on
Update Changesbutton at the bottom.
Step 7 : Deploy to Zeit

- Copy this URL 👉
https://zeit.co/new/project?template=https://github.com/<username>/status/tree/master - Update the username in above URL with your GitHub username. (One you used to fork the repository in Step 1.)
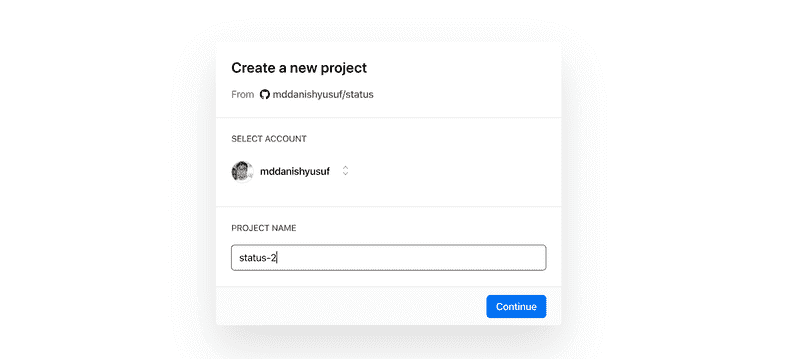
- Zeit page appears asking you to log in and deploy your app.
- Click
Continue->Continue->Continue->Deploy
This is it !
Now you can add custom domain to your deployed status website. We hope you learnt a ton through this tutorial. Give us a pat on back — by writing a share post on twitter. Or contact us , if you have another interesting use case in mind.
Happy Coding ✌️
