This is a hobby blog. You can practice it in your hobby time to grow your skills in 4 areas :—
- Create Airtable API
- Create Google Sheet API
- Learn fundamentals to React frameworks
- Understand how forward thinking developers write their code 👉 DivJoy
Let’s start building our app.
Requirements
- NoCodeAPI Google Sheet or Airtable Endpoint
- Divjoy Access
Step 1 : Link your data

Choose either airtable or google sheet to link your app data.
- Setup Airtable : Go to Google Sheet API to link your sheet data with our endpoint
- Setup Google Sheet : Go to Airtable API to link your airtable data with our endpoint
Step 2 : Export your Code using DivJoy

- Go to the https://divjoy.com/ page.
- Scroll down ->
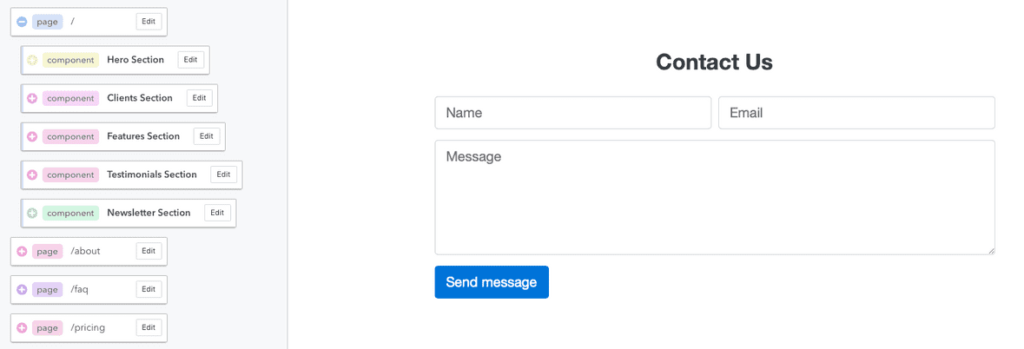
Choose your stack-> ExpandMore Options-> InContact Form-> SelectGoogle SheetorAirtable-> Scroll down ->Choose your template. - You will see the playground to build & Customise the pages.
- If you click on
Contactpage, you will see a form withName,Email, &Messagefields. We will use Google Sheet API end point to collect data and push to the sheet.
Step 3 : Test your code Locally
- Download the code files & unzip folder to set
.envvariables. - Go through
Read mefile you got in divjoy downloaded folder. We are going to test this code in CodeSandBox in next step.
Step 4: Test with CodesandBox

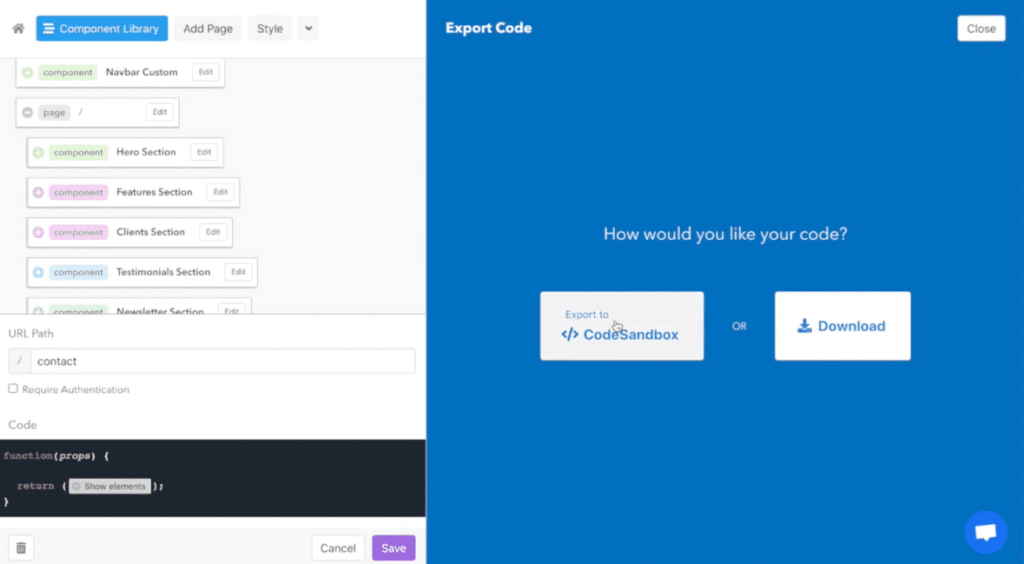
Export Codeto CodeSandBox- Click on
Open my CodeSandBox - You will see this CodeSandBox playground loaded with divjoy project.
- Go to
.envfile and addREACT_APP_SHEETS_ENDPOINTwith your NoCodeAPI Google Sheet endpoint,REACT_APP_SHEETS_TAB_IDwith the Sheet Tab name, & Save. - Go to
Contactpage and test the form.
Conclusion 

This app is only a demonstration of how easy it is to create your app using react frameworks. Divjoy is an easy to use platform and gives you complete control of your code. It is highly recommended if you are short on time and your client can’t wait.
So,, this is it. I hope you enjoyed reading it. Give us a thumbs up on twitter at @nocodeapi.
Watch this demo in action 👇
